Wednesday, December 26, 2012

Christmas and Quilts

Happy Holidays! Merry Christmas! Well technically its no longer Christmas but its okay. I didn't make as much this year as I had the years before, mostly because I'm lazy and there hasn't been enough time. That and I also don't feel that the effort I put into making things isn't exactly appreciated. Anyhow I did make my first full-size quilt for my bf and his grandma as Christmas presents. I mean, who doesn't love blankets? I case you haven't noticed I DO! I have like a million that I just keep around at home. (which my sister never fails to remind me about) Dunno, there's just comfort in them. Like Linus and his blanket. Anyway.. 

The first quilt is supposed to be a 'quick quilt' in that it should be something easy, quick, and done in a day. I, however, beg to differ. I found the idea here  It was time consuming, and my sewing machine threads for some reason kept getting caught up and tangled. I wonder if it was just because I made it at a larger scale. It did take a day to make.. albeit an entire day but still a day nonetheless :) Anyhow here's how it turned out. 
Not tooo bad. I think the contrasting stitches make my mistakes stand out A LOT though haha. 

A close up. Looking at it again, it looks better with more lines all over it like the tutorial shows. Oh well. Maybe next time.


The quilt I made for my bf came out so much better than I thought, and I was super happy about it :) The fabric is this really cute fabric (Camp Sur by Jay-Cyn Designs for Birch Organic Fabrics) I found from one of my favorite online fabric stores.. and reminded me of the trip we took to Yellowstone. An inspiration for a camping quilt! The pattern is loosely based on this quilt from a blog I frequent. Many firsts with this quilt. I ran out of basting spray.. and it being Christmas eve at 10 at night, I resorted to using my quilting pins for the first time. 
It wasn't too hard using them.. but I also ran out of quilting pins. I guess the blanket was too large. If I had a choice, basting spray wins. Even though it makes my room smell like glue. 

Aaaaand here's the final product! Love love this camping quilt. I would say it's almost a full-size quilt. 

 A close up of my favorite piece.. the tent and SUV and trailer :) 

Things to keep in mind for the next quilt. Don't make anything bigger than full-size. Unless of course I upgrade to a better sewing machine. My old Target Singer can't handle it. Too many lines to quilt and it kept jamming on me :( 
Also, I previously read tips on how you need to keep the back of the quilt and the batting larger than the quilt top itself. Which I didn't ever do with my baby quilts and didn't understand why it was necessary. Until now. The quilt top was so big that I guess I didn't realize I lined it up wrong and ended up with about two inches of the bottom part hanging off the edge. And I couldn't just cut that part off.. it was part of the design of the quilt! So what I did was take a two inch fabric remnant of the same color and added it to the backing. It worked fine but it was still annoying taking extra time that I didn't have. Surprisingly, the quilt didn't take too long. A day of cutting and sewing and second day of quilting and binding. I'm sure though, if I ever get around to making that chevron quilt it'll take a big longer :)


Tuesday, December 18, 2012

Chevron Stockings and Hot Cocoa in a Jar

Yay! So the holidays are here, and my sister and I decided not to get a tree this year.. mostly because of the canines in the home and the uncertainty of a certain animal that likes to make his mark everywhere :). Anyhow I still wanted to decorate a little to make the apt feel just a little bit more festive.

Burlap bunting and lights for the window

I made some felt chevron stockings to hang over the fireplace.. using the exact same technique that I used for Grayson's chevron quilt :) 


The layout. I made the minimal amount of squares needed haha. 

Annd cut out a stocking for the backing and used it as a template to cut the pattern out.. sewed it together and voila! A stocking ;)

I used my silhouette to cut out letters (smiley monster font) for an outline for the names. If you look at it up close.. you can see my squares are super crooked..

Buuuuut not from far away!! And yes.. I did not forget my dogs. I mean, they are my children after all :) 

I recently went to a Christmas party with my coworkers.. and since they already got the gifts I thought I would post it. It's a super cute idea I found here from pinterest A"Grown up hot chocolate gift" idea. I made my own hot chocolate mix with a recipe I found here . One batch that I made was enough to fill a dozen mason jars, using half a cup per jar. 
Here they are ready to be packaged. I added chocolate chips and marshmallows. 

If you add one and a half cup of hot water (or hot milk) it's enough for a full mason jar to drink out of :) I tried it myself with the jar just to test it out and realized that the glass makes it too hot to hold.. so I took extra felt and made some personalized cup sleeves! 

The finished product. It was pretty well received.

I added some tags with instructions on how to mix the cocoa and, of course, the Bailey's. Cute and simple. And you get a canning jar out of it :) 


Monday, November 26, 2012

Crochet Minion and Cake the Cat

So I've been really lazy and just been posting pictures on my Instagram rather than updating my blog. Must be all the thanksgiving eating ;) Anyhow I've been trying to crochet everything that I want before the holiday starts and I have to begin with the present making!

I love love Despicable Me and have been wanting to make a Minion forever. I mean, I already made Agne's unicorn!  As far as the pattern is concerned, it was simple enough to just make up as I went along but there are a couple of websites with free patterns posted. Like here and here.


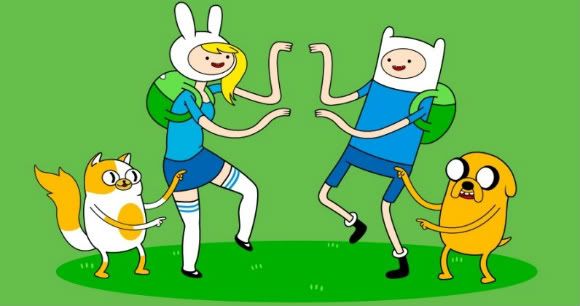
AND theeeeeen.. I totally started watching Adventure Time mostly because I've had requests for crafts related to that show. Funny enough my first (and favorite) episode is Fionna and Cake. I was so confused and thought that maybe Fionna was Finn's cousin or something but it turns out it was just Ice King's fan fiction. Booooooooooo. Still gotta love a tv show that does its own gender swap. 


Anyway, since I already made Jake the Dog, here's his gender swap version Cake the Cat! It's funny how fast I can crochet something when I really want it done. I whipped up Cake in about 7 hours.. during the new episodes of Walking Dead, Once Upon a Time, Revenge, and a couple episodes of Supernatural.. 


I feel the makings of Fionna's rabbit hood coming soon to go with Cake the Cat haha! Maybe when the Christmas rush is over ;) We'll see. I'm becoming a hoarder with all these softies that I've made that I can't let go. I swore that Mac the unicorn was going to be the last one, but then I made the Minion, and Cake! Cake will be the last.. I swear! And yes, there's Hobbes still going strong! He's getting a little worn down but is the unofficial leader of this motley crew :) 


Hopefully I'll be able to get a couple of posts before the holidays. Maybe some easy peasy DIY stuff? Until then, Happy Holidays and happy crafting :) 


Wednesday, November 7, 2012

Modge Podge iPad Case

Anytime I get any electronic device (i.e. phone, Kindle, iPad) the first thing I do is spend all night making a case for it. For my iPad, I actually made two cases.

First one is like a notebook thing with a pocket for headphones and charger. AND its supposed to stand up but it was too flimsy and its a little bulky so I stopped using it after..

I made this envelope sleeve. It's a little snug but I love it!

And then my aunt came back from China and brought with her a bunch of iPad cases. It's ugly.. 
(case in point)

But it'll be good for school. So googled mod podging on fabric and went to work!


I read somewhere to modge podge the fabric first and then glue it on. So I painted a layer.. and left it overnight to dry. Then I glued it onto the case and left THAT overnight to dry. 
The end result. 

Not too shabby! I know.. you can still see the writing through the white pattern on the fabric. Should've used white fabric underneath it or something. Oh well! It's a little stiff from all the glue.. but it doesn't matter I'm only using it for school. :)


Tuesday, October 30, 2012

Baby Name Chevron (or Zig-Zag) Quilt

Here's my third quilt! And I am happy to say that it is getting easier. This is my first time using a blocking method.. from this awesome tutorial here. As soon as I saw it I had to make one for my friend Kris and her new baby. For a project like this, you just have to find the perfect person to give the gift to. I've learned that some people don't appreciate handmade gifts like they need to be appreciated. I mean, it wasn't hard, just very time consuming. Like I posted about before, I am in looooove with the chevron pattern. Which to some people say its technically not chevron.. it's zig zag. Whatever you want to call it, here it is! 

Getting the general layout before sewing it together. I double checked everything more than twice. I had no intention of using my seam ripper! 

Final product. Love how it came out!!! 

You can see some areas where the stripes are a little uneven. I have a feeling this goes back to my crooked sewing. HAHA. By far, the longest I've taken on a quilt. One day of cutting and sewing. One day of quilting and then a day of appliqueing and binding. I'm planning to make a queen-size one for my bed... which'll probably end up taking a week if I ever get around to it :)

I also made this car seat cover from this tutorial here. Super cute and super easy! My favorite combination  :)

Happy early Christmas Grayson! Hahaha

EDIT: I've been getting a few questions on how I did the name "GRAYSON" I basically followed this tutorial here.. using the font "smiley monster." I actually just reversed the letters on photoshop and held the heat n bond up to my computer screen and just traced from there (the lazy way hehe) I then ironed onto the fabric and sewed around the letters with a zig-zag stitch (my preferred way). Hope this helps! Thanks for the compliments :) 


Sunday, October 28, 2012

Halloween Costumes :

It's Halloween time! I love Halloween mostly because I love making things :) When I was younger Halloween was all about revealing costumes purchased from Legg Avenue.. you know the sluttier the better! However I think I'm over that period (Or just older and fatter) and am leaning more towards comfy and cute. Mostly comfy (and cheap!).. i.e. my costumes the past two years. 


Cheshire cat in 2010. Super easy.. I messily threw together a pink and purple skirt from knit fabric and had a striped purple and pink tank. Crocheted ears attached it to headband and then a tail to attach to the skirt.. and VOILA! Cheshire cat :) Probably came out to less than $10.


Glee fanatic over here. So of course I was a female Warbler in 2011. Found a JCrew blazer at Goodwill (score!) for $8. Sewed on bias tape I bought from Jo-Anns $2. Bought the patch from ebay for another $2 and then the tie somewhere online for $15. $27. The tie made it a little expensive :) AND BTW NOONE REALLY KNEW WHO I WAS! 

So this time around I REALLY wanted to be comfortable. I saw this  on pinterest and had to make it! You can read the tutorial if you want.. it's pretty detailed but I was too lazy to and just kind of looked at the picture.

I just took my most comfortable dress and used it as an outline for the fish costume. Then added a hood and cut out scales and glue-gunned them to the dress. I just bought two yards of fleece fabric (on sale!)  at Jo-Ann's for < $10.


Aaaaand here's how it came out! Not bad.. of course it looks way cuter on that little kid. Stupid me I used fleece. Should've stuck with the knit fabric. Living in southern California for so long you would think that I would know by now that it would still be like 80 degrees at the end of October. At least it was sleeveless ;)


Friday, October 26, 2012

Adventure Time: Finn's Backpack

So Halloween is just around the corner, and earlier this month my friend Barbara asked me to make her Finn's backpack from Adventure Time to add to her costume (which I really should start watching since earlier this year my coworker had asked me to crochet Jake the Dog from that show too!) Anyhow never having made a backpack before.. Challenge Accepted!!

For those of you who aren't familiar, here's Finn, his backpack, and his dog Jake. Haha.. they're a little weird looking if you ask me.

So here's the final product! I completely winged it.. I just kind of put the bag together the same way as my Amy Butler weekender and it didn't come out too bad. I just wish I should have used something stiffer to give the backpack more shape. Oh well! 

It's a fully functional backpack, with a large zippered pocket big enough to store a sword and whatever else you might need for those adventures ;)