Thursday, December 22, 2011

Easy DIY Christmas present.. #3 :)

Ok so I know that I'm not really allowed to complain about what is called "winter" in southern california, but really, it does get a little cold. Especially my extremities. Here is a super easy tutorial on some reusable hand warmers.

Supplies: 
Fabric (any on hand as long as its microwavable)
Rice
Essential oil (optional)

If you have essential oil (I used lavender) place the rice in a small ziplock bag and add few drops of the oil inside and shake it around. 
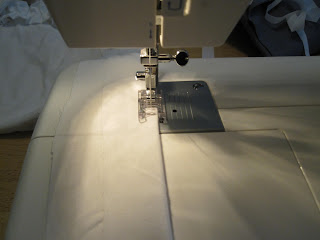
Then, sew a small square together (mine is about 4.5x 4.5), leave about a two inch opening to pour in the rice and sew together! I used pinking shears to cute-ify it. Okay, mostly so I don't have to worry about the seams at all. 


Pop it in the microwave for about 30 seconds and the warmth should last about an hour. It would make great stocking stuffers and its totally reusable. Cut a bigger square and you can make feet warmers for those cold beds. Cut the fabric into different shapes for uber cuteness like hearts, animals, oh the possibilities are endless :)

Wednesday, December 21, 2011

Easy DIY Christmas present.. #4 :)

So it's been forever again since I last posted.. too busy buying myself my friends gifts. And of course making them too :) For those of you who aren't counting, Christmas is four days away. Sooo for the next four days I'm going to post some super cute easy peasy tutorials that I've found (and tried) for those last minute gifts and/or stocking stuffers :)
If you haven't already, you need to sign up for pinterest. This website, and craftgawker, are where I waste spend the majority of my time browsing and just generally getting ideas for Christmas! And this is where the braided circle scarf tutorial comes in. I found this super cute scarf on pinterest. 
From a swedish website.. 
I thought.. "I can totally make this!.. once I figure out how to..." But thankfully I found a tutorial that did the thinking for me..
Annnd here's the scarf!
The tutorial is pretty straight forward and the scarf came together pretty much within a hour. The only thing that took awhile was blindstitching only because I'm lazy and don't like sewing by hand ;)

Just a note.. I tried it with a t-shirt that I cut up, and it came out too short and kind of cheap looking. This is the second attempt, with some knit fabric I got from Joann's. Much better, more fuller, and still about half the price  :)


Saturday, September 10, 2011

Random crafts :)

So it's been forever since I've blogged. Mostly because I'm lazy I'm a big girl now and moved to my own place. Crafting has been put on hold temporarily. Buuut the best part is now I have a craft corner allll to myself where I don't always have to put away my sewing machine whenever I leave the table. It is so awesome.

I have this bad habit of whenever I go to a fabric store I pick through the 50% off remnants leaving me with quite a stash.
This is just one box ;)
HOWEVER, the stash came in handy in an attempt to add some color to my apt :)
Um.. future fabric flower project in mind for that vase ;)

A throw pillow that looks like one from Target :)

Another throw pillow. Playing around with ric rac. Please ignore the wrinkles. eek.

Dust cover. I just like penguins :)
ANNNNd on to some birthday gifts.

This is a giraffe. Something I came up with. He actually came out quite cute

Another rag quilt. If you can't tell who this is, then I have failed.

13 years ago, on a whim (actually, just because I liked getting mail at school), I ordered a book called Harry Potter and the Sorcerer's Stone from the Scholastic Book Club. Four weeks later that book came and it all went downhill from there. I recently watched the last Harry Potter movie and I have to say, it was pretty bittersweet. In my way of coping, I crocheted Hedwig. And to be honest, when she died, I cried.  HP <3 

*On an ending note. Tomorrow is 9/11/11. I don't like to be cheesy and I know it's all over the news, but I still cannot believe it has been ten years since the twin towers fell. I can remember it like it was yesterday and I am ashamed to admit that at that time, I did not truly think about the impact, the devastation, that that event would have on America. Especially being in the medical field now, I cannot even begin to fathom the terror, the fear, the feeling of helplessness knowing that there is nothing you could have done to save those people and then, your colleagues. Thank you, you are an inspiration to us all, a reminder of what it really means to be an American, a true hero, and you will always be remembered. 


Thursday, June 9, 2011

Adventures in rag quilting.

So I've been wanting to dabble in quilting for awhile, but the time and thought put into making a quilt is quite daunting.. so I've recently rediscovered rag quilting! What I consider my crawling step, I've already made a few mistakes that I can take with me when I actually do start quilting (whenever that is hah!) And I say rediscovered; because when I first got my sewing machine I went blanket crazy and sewed a bunch of rag quilt blanket animals. Sadly, this was before I started taking pictures of things so I only have two photos to share. 
My rag quilt puppy. It's a Simplicity pattern. 

My favorite lap quilt. Rag quilt NEMO! :)
For some reason, it never occurred to me that it could be an actual normal blanket shape, until I saw one that my friend, Kevin, had. And THEN I went a-googling and it was all downhill from there. Haha. Actually I've only made one so far, but it's so much fun I'm sure I'll be making more. 

Here's the blanket before the washer and dryer. 

Here it is after.
So. The blogs that I've read all say that flannel is the best for rag quilting. So naturally I went with the flannel. And yes it does fray well. And yes it is nice and soft. But nobody mentioned that
a. It frays CRAZY well.  I washed it three times already and it still has thread and lint coming off of it like a mother. 
b. It shrinks. Okay, obviously cotton shrinks but I mean, like I said above, I already washed it three times so it shrank about maybe 80% already. 
I mean, the puppy blanket is just cotton, and the clownfish is fleece.. so this is my first time working with flannel. First and possibly last. :)

Saturday, April 9, 2011

Happy Birthday Benjamin!

SO today was my bf's nephew's birthday party. He's turning ONE! Boy does time fly. Anyhow I had allllllll these ideas in my head as far as what to make him.. so I narrowed it down to two ;)  A simple 'B' initial cloth book (first time with embroidery so it was fun to do) and this cool Dr Suess themed felt alphabet book/hanging.

The cover :)
Yeah, my embroidery needs a little work; but it still came out cute :D
And experimenting with my sewing machine and applique. The bass was hard... I think I'm ready to start quilt making now hahaha

The end. 

Here's the Dr. Suess-themed felt book :)
See, it folds up so you can easily travel with it..

And it opens up to a book-ish thing...

Or you can hang it! (For those of you who don't know.. felt sticks to felt so its mess free for little kiddos ;) )
And I cut out felt words in a 'Grinch' font for some alphabet fun.

Happy first birthday little one. Hope you enjoy your gifts!

Tuesday, February 15, 2011

Happy Valentine's Day!

I love pillows and I love stuffed animals (I have like a million on my bed) so it's about time that I make a stuffed animal pillow. Like pillow pals! Muahaha. Anyhow my first try came out kind of bad due to my laziness.. and my inability to follow a nice curve hahaha.

In case you can't tell.. it was supposed to be a penguin. (bc penguins are AWESOME!) 
Kind of cute.. in a homemade bummy way. 

So I showed it too my boyfriend; who actually liked it and tried to take it away from me. Which gave me the idea to make him one for VDay ;) I tried to make it nicer this time.. 
Valentine's Bear! :)

I added the heart just so he knows the love is there haha. Definitely need more practice with sewing curves. (Btw I got something less cute.. instead of chocolate and flowers; a 8 lb weight ball. Seriously. Thanks hon I get the hint.) 

On another note: I have been eyeing this super cute cupcake apron from Anthro for awhile (I know.. aprons are another thing that I love even though I don't exactly cook hehe).. debating on whether or not I should remake it with a different cupcake fabric pattern.. 
AND I wanted it even MORE when I saw Charlotte York wear it on Sex and the City! :)


Anyhow I was at Border's today bc my one of my bff's got me a giftcard there for Christmas AND I FOUND IT THERE.  It retails at Anthro for $32.. Border's sold it for $24. Totally random and SO AWESOME. So of course I bought myself one! Happy Valentine's Day to me. And thanks Cheryl I love my new apron ;)


Friday, February 11, 2011

Anthro Apron tutorial

I just want to say; I just saw Spring Awakening @ Pantages yesterday and it was AMAZING! Looved it :)


Anyhow on to the tutorial I promised :)
Here's the Tea and Crumpets Apron again; Just because it's so cute ;)

Supplies:
1 yard white 
1 yard pastel green color
Sewing machine
Corresponding thread

Directions:
Cut two rectangular pieces from the white fabric; sizing it up to your body; making it as big as you want. Also cut three strips about 3 inches wide and twice as long as your rectangular piece.


Use the three strips of white fabric and ruffle them. ( See previous post for instructions) Sew three ruffles down middle of one rectangular piece. 

Cut four strips of white fabric about 3 inches wide and as long as you want the neck straps to be. Sew along all three sides, turn inside out and top stitch along the three sides. 

With right side facing down, pin the straps on the inside of the two rectangular pieces with the raw edges facing out. Sew along three sides, leaving the bottom side open. Turn inside out and top stitch along the three sides.

Next, cut two strips of grey fabric about two inches wide and as long as the rectangular piece above is. Fold in half and iron down.


Take one grey strip; pin to raw edge of the rectangular piece and sew. Cut once strip from pastel green fabric 4 inches wide and as long as the white rectangular piece is. Pin and sew to grey strip. Take the second grey strip pin and sew to the green strip. Make sure the match the raw edges. 

You are now finished with the top portion!

Now take the pastel green color and cut two more large rectangular pieces and long and as wide as you want the bottom part of the apron to be. (I cut the bottom piece a little bit wider than the top because I wanted the bottom apron to gather and ruffle a little bit ) Cut one more strip from the white fabric twice and as long as the  rectangular fabric you just cut. Fold the white strip in half, and sew across. Next, about 1/2 inch above that line sew a running stitch. Take the thread and pull to ruffle. Pin the ruffle strip between the two rectangular pieces. Make sure the raw edges are both out. Sew along the three sides; leaving the top edge open. 

Turn inside out and top stitch around. Pin the raw edge of the bottom part of the apron to the top part. Here's where I took the extra fabric and gathered it around the middle so it would ruffle slightly. Sew together.

LASTLY; cut four strips about 3 inches wide and as long as you want your apron straps to be from both the green and the grey fabrics. Make the two apron straps (Follow the instructions from previous post from the belt) Pin to side of apron and sew on. Top stitch and Voila! An new uber cute apron! :D
Not exactly the same; but hey close enough for me :)


Don't laugh; here it is in use! The next Iron Chef of America; with style ;)
I'm sorry, I know I didn't take a lot of pictures this time. I just in such a hurry to finish it. And I know I'm missing the flower and the pocket. I was debating on adding a pocket or not; but laziness won out. Hahaha maybe later on if I have the fancy to I will. If you have questions feel free to email me. Enjoy ;)


Wednesday, February 2, 2011

Anthro Apron turned DRESS tutorial ;D

As an American-born Chinese, I'd like to celebrate my heritage by saying Happy Chinese New Year! My grandpa is visiting from China for the new year and I am loooving it. Nothing taste better than grandpa's cooking and I am totally getting fat off of all these homemade meals ;) 
Anyhow I'd like to start the new year off by posting my first tutorial! I've been eyeing this apron at Anthro for the longest time; I just love the colors and the ruffles. It's the perfect apron if I were to host a tea party! Hehehe.. and I was staring at it on the computer wishing I was a millionaire and suddenly a light bulb went on in my head; "hey I can totally make my own and save about $30!" And THEN another light bulb went on in my head; "HEY how about I make it even cuter and make it into a dress!" (should've bought a lottery ticket that day huh)


So  here it is.. The Tea and Crumpets Apron turned Dress :D
Supplies:
Sewing machine
Scissors
About half yard of white fabric, one yard of light pastel green fabric (or whatever color you choose; the yellow color is uber cute too) and half yard dark grey
Tank top that you don't mind sewing on
One yard of 3/4 in elastic

Just a note of caution; I am a lazy sew-er (?) When I sew I don't use patterns. I typically just eyeball about the size I want and add about 1/2 inch for the sewing and turning. I also don't iron like I'm supposed to. I just kind of fold it and feed it along the sewing machine. Haha.. as long as it still comes out okay!

Directions:
Cut three strips of white about 3 inches wide and twice as long as your tank top.


Hem both sides of the strips. Take one end of each strip and hem that too.


Sewing a running stitch along the middle. (For running stitch; switch your machine to the longest stitch. For mine; it's a 4)  Take the thread at the beginning and pull to ruffle the fabric.


Line up the ruffles on the tank top. Pin in place and sew down the middle.

Voila! You have a cute tank top now. You can stop here.. OR con't on for the skirt part :)

Cut one rectangular piece of white fabric and one same piece from the light green wide enough to wrap around your waist + two or three inches and as long as you want your skirt. ( I went for above the knee and I wanted a high waistline) You can hem the bottom of the skirt now to your desired length. Fold the white fabric piece in half and sew up the two sides. Do the same for the green fabric. 


Place the white skirt, with the front of hemline facing out, outside the green skirt. Make sure the green skirt's front hemline is also facing out. Sew the top of the skirts together. Flip the white skirt so that it is underneath the green skirt. Top stitch them together. 

About an inch and a half away from the top, sew another line. This will be where you put your elastic. 

On the inside of the skirt; cut a small opening between the two stitching lines. Be careful not to cut the stitches! 

Take the elastic and measure it to your waistline; subtract an inch. Attach it to a safety pin; and pull the elastic through the waistband. Take the the two ends and sew together and voila! A skirt. :)

Here you can take the top and the skirt and sew them together to make a dress. I chose not to. I liked that I can mix and match the skirt and top with other things :) Anyhow, on to the belt!

Cut two long strips of fabric from the green; about 4 inches wide and long enough to wrap around you twice. Cut two long strips of fabric from the dark grey; about 2 inches wide and as long as the green fabric. (Here is where I had to pull out the iron.. dangit :) ) Fold the two grey strips in half and iron down.

Place the grey strip in between the two green strips; make sure the fold edge is inside. Sew one side together. Do the same for the other side.

Turn inside out; hem both edges and you have your matching belt. 

Here it is in all it's glory! 
Not exactly it.. but close enough :) Total cost $8.00 
I'm ready for tea now; who wants to come with me to the Huntington Library?! :D

I was debating back and forth as to whether to add the ruffled white edge on the bottom and the pocket like the apron has. But I figured it would look too much like an apron and kept it simple. Enjoy! And sorry if I'm not thorough enough. If you have any questions feel free to email me :)

And even though I don't cook; I couldn't help but make the Tea and Crumpets Apron itself.. since I still had leftover fabric and all :) So watch for another tutorial post on the apron! ;)